Showing posts with label Crap to Craft. Show all posts

Tuesday, August 28, 2012

2 Back to School DIY T-shirt projects!!

So....I took the entire summer off from blogging. It has been wonderful but I am glad to be back.  And since my kids start school next Tuesday I have a project list forever long that I am dying to get to. These next two projects for back to school are more of my Pinterest finds. How did I ever survive before Pinterest?
 
 
The first is a DIY painted stripe T-shirt. All I needed was a plain white T, some painters or masking tape and basic acrylic craft paint. I choose neon because I am on a neon kick right now.
Lay your shirt as flat as you can and don't forget to line the inside of the shirt with wax paper or in my case an old plastic IKEA cutting board. (so that the paint does not leak through to the back side)
Next place your tape to desired stripe length. I just made sure mine got progressively closer together.

 
**TIP- I used pieces of tape that were long enough at the ends to attach it to the table. This kept my shirt secure and stable while I painted it.**

 
The rest is easy. Paint. Let Dry. Peel off tape.
 
Super cute trendy shirt that cost under $10.00.
 
This next project did not go so well.
It's a Watermark Tee and it did work, but it was also a for sure my "tester" and I'll tell you why...THE GLUE. That darn glue. I was suppose to use the BLUE Gel glue you find in stores, only I could not find it anywhere!! So I used the next best thing which was the clear Gel glue. And technically it totally worked (dye wise) but the letters bleed together everywhere so much that you can't even read what I wrote. Not to mention that because it is clear...I had a hard time reading my own writing when I was putting it on.

I'll give you the quick tutorial anyways because it does work you just have to really make the glue come out in a thin line.
Start with a plain white T,  BLUE Gel glue, and a small bottle of RIT dye. Choose a quote, or a lyric or a saying you love to write on the shirt in glue.
I choose to write the word Love in as many languages as I could...but you would never be able to tell looking at it.
Next, let it dry completely. I let mine sit for over 24 hours. Then follow the directions on the back of the RIT dye container.
 
Voila! Another cute and creative shirt for Back to School!

Tuesday, September 13, 2011

Serious DVD makeover!

My dream is to walk into every single room of my home and every little thing has a place and is organized. Because it will be 17+ years before I have all my mess makers out of my house....I just like to dream. But when things start to look something like this:


...(a close replica of all of our family DVD's) then things have got to change.


Husband brought home a bunch of these awesome storage boxes and we got to work pulling DVD's out of their cases, put into sleeves, labeled and alphabetized.


.


.

When all was said and done. ALL of our massive collection fit nice and neat into these 2 boxes.


I'll tell you, I loved this project so much I went around the house looking for more things I could downsize.


I love it. My kids love it. Project 1 of 3,497----DONE!

Tuesday, July 19, 2011

Crap to Craft- bookshelf entertainment center (a work still in progress)

Last month my handy hubby took on the project of creating an entertainment center. We had previously been using my in laws and now we needed to fill the HUGE empty wall where it once was.


I wanted something light! I have slowly been going in different directions in my decorating and I really just wanted to de-clutter and brighten things up a bit.


Loverbuns, (he would die if he knew I called him that on here) started with white bookshelves from IKEA. Oh lovely, lovely IKEA.


And then he went to work.


This boy amazes me. So far this is the finished entertainment center...


It isn't quite done because as you can see 2 shelves are pretty empty and I am planning on lining the back of the shelves with a grey print contact paper or even wall paper if I can find it, just to add a touch of color. And then I need to figure out what I want hanging on the wall behind this whole thing?


So many options, I am loving it.


Big pat on the back to my very own handy manny.


Monday, July 4, 2011

Crap to Craft~nick name T-shirt

I didn't have a ton of time to put together a birthday present for one of my sons best friends so it was a little last minute. But I actually think is is one of my favorite gifts that I have ever made.

We went to the store and got him a fun little Nerf gun and I bought a plain white T-shirt.

I love thinking up projects for my Silhouette and I was determined to think of a gift idea for this little boy.

His name is Ryan, but in his family he is called by a bunch of cute nick names. His mom even wrote up a post about them all on her family blog so that's were I headed to find them.


Once I had them all saved I entered them into my program for my Silhouette and organized them all cute with different fonts.


Then all I had to do after they were cut out was set them where I wanted them and ironed them on.


Easy peasy and the birthday boy ended up LOVING it!

Wednesday, May 25, 2011

Crap to Craft~ shabby apple inspired skirt

**BTW, I have started a new summer project- HERE- and would love your help!:)**
.

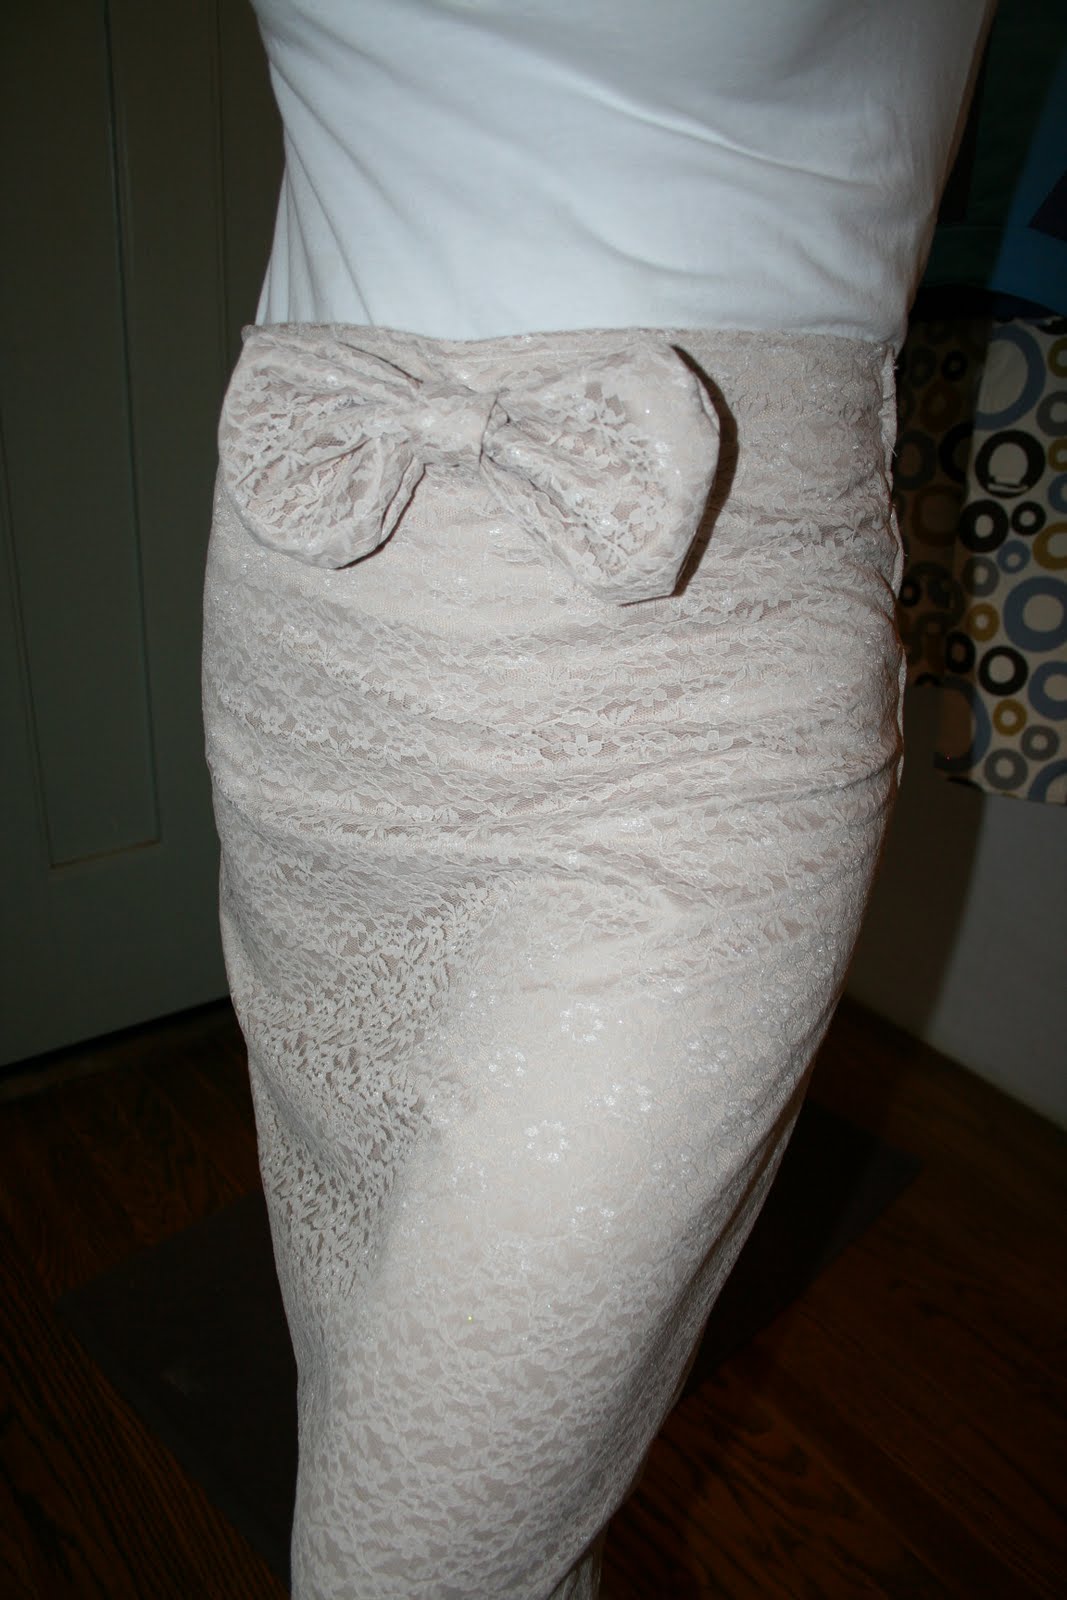
Ok, first off I have to explain that this project DID NOT start off as "Crap" that's just the name of my refashion posts. We got that straightened out? Great, In fact, this project actually started out as a beautiful dress.


A beautiful dress given to me by my sweet friend Tiffany who made it a little small so she mistakenly thought that I was small enough to fit into it.


Not the case.


I apparently have what some would call Swimmers Shoulders and couldn't even put my arms through.


I didn't want this beautiful fabric to go to waste and I remembered this beautiful skirt I saw over at Shabby Apple and I had to make it!!

I cut the top off the dress. I totally reshaped the bottom turning it into a pencil skirt and....believe it or not....put in MY VERY FIRST ZIPPER!!!!


I can not tell you how excited I was. I have been sewing for about 6 years and have always been afraid of zippers till now. Dumb. I have missed out on a world of possibilities.


So this is the finished project:


I think I am in love!


Pretty darn close to the one at Shabby Apple and custom fit to my rear.


.


More zippered skirts are in my future. Love. LOVE them.


Friday, May 13, 2011

Crap to Craft- fun summer sandals

It's cold here. I had a swimsuit sent to me to review about a month ago (review and giveaway on that soon to come to Leelou) but it has been so windy and overcast here I haven't been able to get some sun on my pasty skin to take pictures in it.


I'M READY FOR THE SUN!!!


And to get me in the mood, I had to make some fun summer sandals for my girls. My mom made some of these the other day for them and I had to make more. I'll have to take pictures of the ones she made they are multicolored and fun for all the birthdays I have next month.


You start with a simple pair of flip flops.


Buy a pack of small water balloons and tie them on. You need 100 balloons for each shoe. I tied them twice to make sure they held.


They end up something like this:


You can pull and poke them to shape the way you want them. Adorable and the whole project cost $3.00!!!

Monday, April 11, 2011

Crap to Craft~ maternity shirt refashion

.

I have been organizing my closet and trying to downsize. So I came across a few shirts that I thought would be great to refashion into something for my girls. I was inspired by this adorable $40 skirt from JCrew.


I assure you this project does not even need a tutorial it is so self explanatory but here goes.
Oh, and because I despise doing tutorials this is the step I was on before I remembered to take a picture.

It was just a plain maternity Tee when I started out. I measured the length on my daughter to see where I wanted it to hit (plus a little over an inch for a casing) and cut the shirt straight across the top leaving the hem of the shirt as the bottom of the new skirt.


I grabbed some elastic and made a casing on the top of the shirt.


Wala....plain skirt done. But now I wanted to make it girly and nothing says girly better than ruffles. I didn't have any chiffon like the JCrew skirt used so I decided to skip it and just do the ruffles.


I cut one inch strips of fabric out of the rest of the shirt leftovers and sewed down the center with a long stitch and pulled the bobbin thread to make the ruffles


.I layed them where I wanted them...pinned and sewed them right on.


.


.


That's that!

I loved it so much that I grabbed another shirt...

and made one for my littlest daughter.

.


Comfy

Easy

and FREE!!!

Tuesday, January 11, 2011

coffee filter wreath

Wow.
It's been a while. I can't seem to get 10 minutes to myself without baby for any kind of crafting or sewing of anything besides capes. Well, besides the 40+ scripture cases I made last week (more on that another time)
This post is about my beautiful baby sister and her crafty little self. She made this super cute coffee filter wreath.
I love it!


I want to make 10 in all different ways....and I'm gonna. But if you would like her tutorial head on over to her blog.

Thursday, August 5, 2010

Naartjie inspired Crap to Craft!

.
We are slowly sifting through clothes and making piles for a future Garage Sale. I came upon this shirt which is a size 14. Our oldest is 7, so it would be a LONG time before this shirt would have fit.... but I love me some owls and couldn't bring myself to toss it out.
Being the huge fan of Naartjie kids clothes that I am, I took a closer look at this shirt and figured I could save it, mix it up and turn it into a comfy Fall dress and leggings for my 3 year old.

I started with the leggings, I cut the thermal fabric sleeves off of the shirt and sewed them onto a pair of size 4 panties.

Leggings-Finished!!
.
For the dress, I turned the shirt inside-out and took everything in about an inch and a half. Neck (on both sides), sleeves (I also pleated these), and sides. And for more of a fitted look I put a pleat in the back of the dress also. Dress-Finished!!

.
All in all this project took about 45 minutes.
p.s.- click HERE for an Awesome package Giveaway!


Thursday, March 4, 2010

Re-fashion: T-shirt dresses

I have 2 girls and about 20 t-shirts that are either to short for them or have a big stain on the front. I have had a few of these such shirts set aside to make dresses with and it just never happened. Then my friend Suzanne gave me a great pattern and now I can't stop making them. This is a picture of the first one I did, not quite finished.
This is the second, I put the flower over a stain.. and yes had I had more than 5 minutes to finish this I would have used blue thread instead of pink for the stem of the flower. Oh well.


I LOVE them and plan on making tonz more, I think some with tank tops for summer!!

Friday, October 9, 2009

sweater dress

~Crap to Craft~


I have had this old sweater since high school and held onto it because I love the colors.

*note- this picture was taken after I had already started to cut into it. I always forget to get my camera out*

It has become smaller and smaller on me it seems so I wanted to re-fashion it and thought a yummy fall sweater dress for Macie was perfect:


I should have waited till morning to snap some pictures but knew I would forget.


I love how it turned out and am now running off to my closet to find more old sweaters to chop up!

Tutorial over at Get your Craft on.